Bicycle light R&D and manufacturing since 2009 · OEM / ODM / Buyer Label · Average response time ≤ 3h
0%

Choosing a Cutoff Beam Bicycle Headlight is not simply a brightness contest. Beam control matters more than impressive lumen numbers. A focused pattern should light the pavement ahead while reducing glare for approaching riders, drivers, and pedestrians.

The World Health Organization’s Global Status Report on Road Safety 2023 recorded approximately 1.19 million annual road deaths worldwide. Vulnerable road users represented more than half of those fatalities. These figures do not prove that one headlight prevents crashes. They do show why visibility deserves careful attention. The German StVZO lighting approach also emphasizes controlled illumination rather than uncontrolled glare.

Peter White, a long-time bicycle-lighting specialist, states, “A bright light is not necessarily a good light.” His point remains practical. A poorly aimed lamp can create a white hotspot, hide potholes outside the beam, and disturb someone riding toward you. I have found that beam shape becomes obvious on dark paths, especially near wet asphalt and tree shadows.

When comparing a Cutoff Beam Bicycle Headlight, examine the beam’s upper edge, mounting stability, side visibility, battery behavior, and weather resistance. Check whether the lamp remains aligned after braking or crossing rough pavement. Look beyond marketing claims. Laboratory lumens may not describe real road performance.

There is no perfect model for every route. Urban streets, unlit trails, and shared cycleways demand different compromises. A useful decision begins with your actual riding scene, not the largest number printed on the package. That is where many buying guides become too confident.
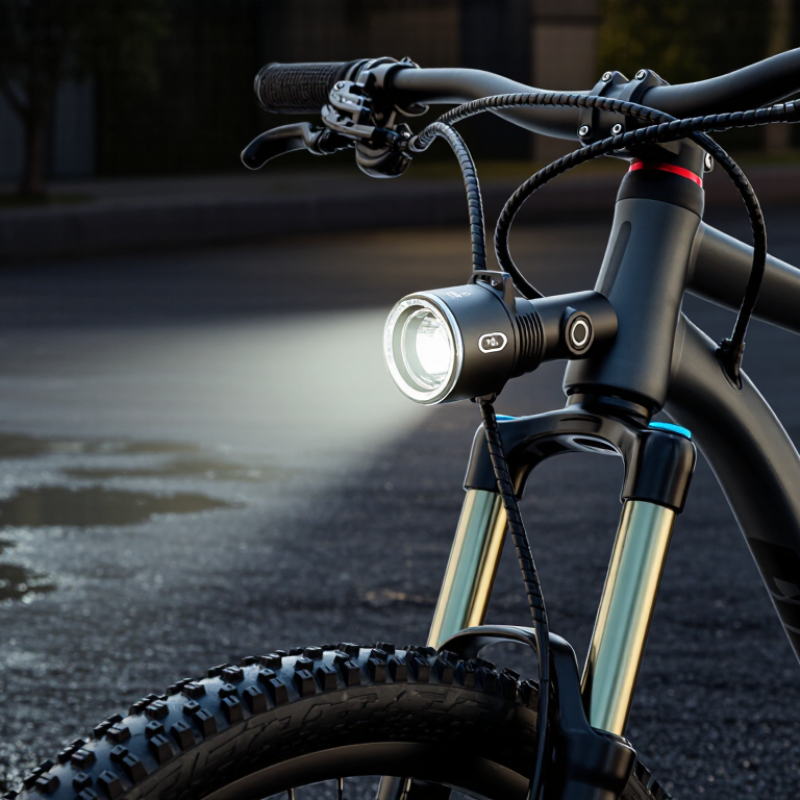
How to Choose a Cutoff Beam Bicycle Headlight?

Define the Riding Environment: 10 Lux for Roads, 100+ Lux for Dark Trails

How to Choose a Cutoff Beam Bicycle Headlight?

Start with the road, not the lamp’s advertised maximum output. For lit streets, around 10 lux on the pavement can provide useful lane awareness without creating excessive glare. This is a practical target, not a universal legal requirement. CIE 115:2010 and the Illuminating Engineering Society’s roadway guidance both stress uniform lighting, controlled glare, and visibility of hazards. A cutoff beam supports those principles by keeping intense light below eye level. Aim it carefully. A bright beam pointed upward can make a modest headlight unpleasant for drivers and cyclists.

Dark trails require a different approach.

A field target above 100 lux can reveal roots, loose gravel, and sharp bends at useful riding speed. The beam should spread across the trail, not form a narrow tunnel.

Independent bicycle-light testing reports commonly evaluate measured illuminance, beam shape, runtime, and thermal stability, rather than headline lumens alone. That distinction matters. A 1,000-lumen light may perform poorly if its hotspot hides the edges.

Test the beam at your normal riding height. Place the bicycle on level ground, then check visibility 10 to 20 metres ahead. Watch for shadows behind rocks and sudden brightness changes.

My first setup was too bright for shared roads and too narrow for wooded paths. I would now choose adjustable output, a stable cutoff, and honest runtime data.

Weather, battery temperature, and mounting angle can reduce real performance. Marketing numbers rarely show that messy part.

Compare Beam Metrics: Lux Shows Illumination; Lumens Show Total Output

How to Choose a Cutoff Beam Bicycle Headlight?

Compare Beam Metrics: Lux Shows Illumination; Lumens Show Total Output

A cutoff beam bicycle headlight should light the road without shining directly into approaching eyes. In practical road testing, lux helps explain how bright a surface appears at a specific distance. Lumens describe the lamp’s total light output, including light that may spread outside the useful road area. Neither measurement tells the complete story alone.

I once chose a headlight with impressive lumen numbers, but its beam pattern felt wasteful. The road ahead looked uneven, while nearby signs reflected harshly. That mistake taught me to examine beam shape and lux readings together. A focused beam with moderate lumens can offer better visibility than a high-output light with poor control. Check whether the published lux value includes a clear testing distance, such as ten metres. Without that detail, comparisons become uncertain.

Tips: Aim the cutoff just below eye level. Test it on a dark road, not only indoors. Look for even illumination near the front wheel and farther ahead. Use the lowest effective setting in traffic. A bright hotspot is not always useful. Battery capacity also matters, because output may drop after extended riding. Read independent measurements when possible, but remember that mounting height, road texture, and weather can change real-world results. I still reconsider my choice after every night ride. Experiences vary.

Check Optics and Safety: Choose a StVZO Cutoff to Reduce Glare

Choosing a cutoff beam bicycle headlight starts with the beam pattern, not the highest lumen number. A StVZO cutoff keeps most light below a clear horizontal edge. It illuminates pavement while reducing glare for approaching riders. On a dark cycle path, I look for an even pool several meters ahead. There should be no black gap near the front wheel. A bright spot is impressive. It is not always useful.

Check the lens from the front and test the light after sunset in a quiet area. The upper edge should look controlled, while the road surface remains readable across the lane. Mount the lamp level. Then adjust it from your normal riding position. Even a small tilt can send glare into traffic. Look for genuine StVZO compliance information, not only phrases like “cutoff” or “anti-glare.” Certification details should appear clearly in the instructions or housing. Local requirements can differ, so verify them before regular road use.

Beam shape still matters more than raw output. In rain, dirty optics, or a vibrating handlebar, even a good cutoff can become distracting. Wipe the lens and tighten the mount. Then watch the beam beside a wall. I sometimes prefer slightly less brightness with a cleaner edge. That choice feels conservative, but it reduces repeated flashes into faces. A wider side spread may improve corner visibility, yet excessive spill can weaken the cutoff. Check both.

How to Choose a Cutoff Beam Bicycle Headlight? - Check Optics and Safety: Choose a StVZO Cutoff to Reduce Glare

Selection Dimension What to Check Practical Target or Requirement Why It Matters
Beam Optics A sharp horizontal cutoff with light directed toward the road Choose a true cutoff beam rather than an unrestricted circular or wide flood beam Limits upward light and reduces glare for oncoming cyclists, pedestrians, and drivers
StVZO Compliance A visible German road-approval marking on the lamp housing or documentation Look for the official approval symbol containing a wavy line, the letter “K,” and an approval number Indicates that the lamp has been tested against applicable German road-lighting requirements
Illuminance Measured illumination on the road, expressed in lux For Germany, bicycle headlamps are generally required to provide at least 10 lux under the applicable StVZO provisions; higher measured output can improve visibility when properly controlled Lux describes illumination on the road surface, not simply the LED’s maximum lumen output
Beam Distribution Road coverage close to the bicycle and farther ahead Prefer an even, rectangular or gently widening pattern without strong dark gaps or distracting hotspots Provides better visibility of the road surface, edges, obstacles, and surface changes
Cutoff Height Whether the cutoff remains below eye level when the lamp is correctly mounted Aim the beam so the cutoff does not point into the eyes of road users; follow the lamp’s installation instructions A correctly designed lamp can still cause glare if it is tilted too high
Brightness Control Whether the lamp has road-legal steady modes and avoids unnecessary flashing Select a stable low or medium setting for lit streets and a stronger setting for dark roads, where permitted Using only the highest output can shorten runtime and increase discomfort for other road users
Runtime Continuous operating time at the selected brightness level Choose a lamp offering at least 1.5–2 hours of claimed runtime at the mode you normally use, with a low-battery warning if possible Provides a practical reserve for commuting delays, cold weather, and battery aging
Weather Protection Ingress-protection rating for rain and road spray IPX4 protects against water splashes; IPX5 or higher offers stronger protection against water jets Helps maintain reliable operation during wet commuting conditions
Mount Stability Handlebar compatibility, anti-slip material, and resistance to vibration Use a rigid mount that keeps the lens level and centered; verify compatibility with the handlebar diameter Prevents the cutoff from bouncing upward and causing temporary glare
Power and Charging Battery type, charging connector, charge indicator, and recharge time Prefer a protected rechargeable battery, a clear charge indicator, and a charging system that can be checked before every ride Improves daily reliability and reduces the risk of riding with an unexpectedly empty battery
Color Temperature The apparent color of the white light A neutral or slightly warm white around 3,000–5,000 K is usually comfortable for road use Very cool light can create more apparent glare and may make wet-road reflections more distracting
Visibility to Others Side visibility and a separate rear light or reflective equipment Choose a front lamp with some lateral visibility, but do not use side light as a substitute for a correctly aimed beam Helps other road users detect the bicycle while preserving a controlled forward beam
Final Safety Check Test the lamp from the perspective of an oncoming road user At a short distance, the source should not appear uncomfortably bright above the cutoff; re-aim or lower the lamp if necessary Confirms that the optical design, mounting angle, and real-world setup work together to reduce glare

Note: Road-lighting requirements can vary by country. Always check the local regulations and use the official approval information supplied with the bicycle headlight.

Match Beam Distance to Speed: Assess Illumination at the 10-Metre Mark

How to Choose a Cutoff Beam Bicycle Headlight?

Match Beam Distance to Speed: Assess Illumination at the 10-Metre Mark

A cutoff beam should light the road without shining into approaching eyes. Test its brightness at 10 metres, not only beside the bicycle. At 15 km/h, ten metres provides about 2.4 seconds of visual planning time. At 25 km/h, that falls to roughly 1.4 seconds. Fast riders therefore need stronger, more uniform illumination beyond the test point. A bright patch directly ahead is not enough. Potholes can appear suddenly.

German bicycle-lighting requirements commonly use 10 lux as a minimum reference for front lamps. However, lux alone does not describe beam quality. The CIE 115:2010 road-lighting guidance also stresses uniformity and glare control. This matters on narrow cycle paths, where a sharp upper edge can protect other users.

The U.S. National Highway Traffic Safety Administration recorded 1,105 bicyclist deaths in 2022, showing why visibility deserves careful attention (Traffic Safety Facts, 2022). Lighting cannot prevent every crash. It can improve recognition time.

Tips: Place a light meter, or a phone sensor, at the 10-metre mark. Aim the cutoff below eye level. Ride past a wall and inspect the beam edge. Check again after mounting bags or changing riding posture. I sometimes prefer a slightly wider beam, even with less peak brightness. The measurement is imperfect, but the road rarely is.

Verify Battery Performance: Compare Runtime Under ANSI FL-1 Test Conditions

A cutoff beam bicycle headlight should provide usable light without wasting battery above the road. Battery claims deserve careful checking. ANSI/PLATO FL 1 defines runtime as the period until output falls to 10% of its starting level. That is not the same as total time before the lamp switches off. A light may appear bright for two hours, then produce weak illumination for several more.

Compare runtime using the same ANSI FL-1 mode, not the headline maximum. Check the test battery type, temperature, and operating mode. High brightness often creates heat, which can trigger automatic output reduction. Lithium-ion capacity also falls in cold conditions. Small details matter. I once compared two lights using only their “maximum hours” figures. The results looked impressive, but neither figure described steady road-level brightness.

Look for independent test data or clearly documented laboratory methods. ANSI/PLATO FL 1 offers a common measurement framework, but it does not automatically prove every manufacturer’s claim. The U.S. Department of Transportation’s NHTSA reported 1,105 pedalcyclist fatalities in 2022, reinforcing why reliable nighttime visibility deserves more than marketing numbers. For commuting, record the actual runtime at the chosen setting. Recharge the battery fully, mount the light on a bicycle, and inspect the beam after one hour. If the cutoff edge becomes dim or uneven, the published runtime may not match practical safety needs. That uncomfortable gap is worth noticing.

Cutoff-Beam Bicycle Headlight Runtime Comparison

Compare expected runtime across common light modes under ANSI FL-1 conditions. ANSI FL-1 runtime ends when measured light output falls to 10% of the initial output.

How to use this chart: A longer runtime at the selected brightness level indicates better battery performance. Compare lights using the same test method, temperature, battery condition, and output level.

FAQS

How bright should a bicycle headlight be on lit roads?

Around 10 lux on the pavement can support lane awareness on already lit streets.

What brightness suits dark trails?

Dark trails may need more than 100 lux at normal riding speed.

Why does beam shape matter more than advertised lumens?

A high-lumen light can still hide trail edges or create harsh glare.

How should I test a cutoff beam?

Place the bicycle on level ground at your usual riding height.

How can a cutoff beam reduce glare?

It keeps intense light below eye level when adjusted correctly.

How should bicycle-light runtime be compared?

Compare the same brightness mode under the same test conditions.

What does a standard runtime test usually measure?

Many flashlight standards measure until output falls to 10% of its starting level.

Which conditions can reduce real battery performance?

High brightness can create heat and trigger automatic output reduction.

What features should I prioritize when choosing a headlight?

Choose adjustable output, a stable cutoff, wide coverage, and honest runtime data.

Conclusion

Choosing a Cutoff Beam Bicycle Headlight starts with understanding where you ride. For paved roads with street lighting, around 10 lux may be sufficient, while dark trails often require 100 lux or more for confident visibility. When comparing products, remember that lux measures how much light reaches a specific area, whereas lumens describe the lamp’s total light output. A high lumen rating does not always guarantee useful road illumination, so beam quality matters.

Look for optics with a clear StVZO-style cutoff to reduce glare for approaching riders and drivers. The beam should also match your riding speed, providing useful illumination at least 10 metres ahead so you have time to react to obstacles. Finally, evaluate battery performance by comparing real runtime figures tested under consistent ANSI FL-1 conditions. Considering riding environment, measured illumination, cutoff design, beam distance, and verified runtime will help you select a safer and more practical headlight.

Ethan

Ethan

Ethan is a dedicated marketing professional with a deep understanding of the company’s products, services, and customers. With strong experience in content strategy, market research, and business communication, he transforms complex product information into clear, practical, and engaging insights.......